
Last year, a customer sent me photos of their half-installed LED neon flex1 project. While the first section lit up perfectly, everything went dark after a right-angle turn. Their supplier's only suggestion was "try another strip."
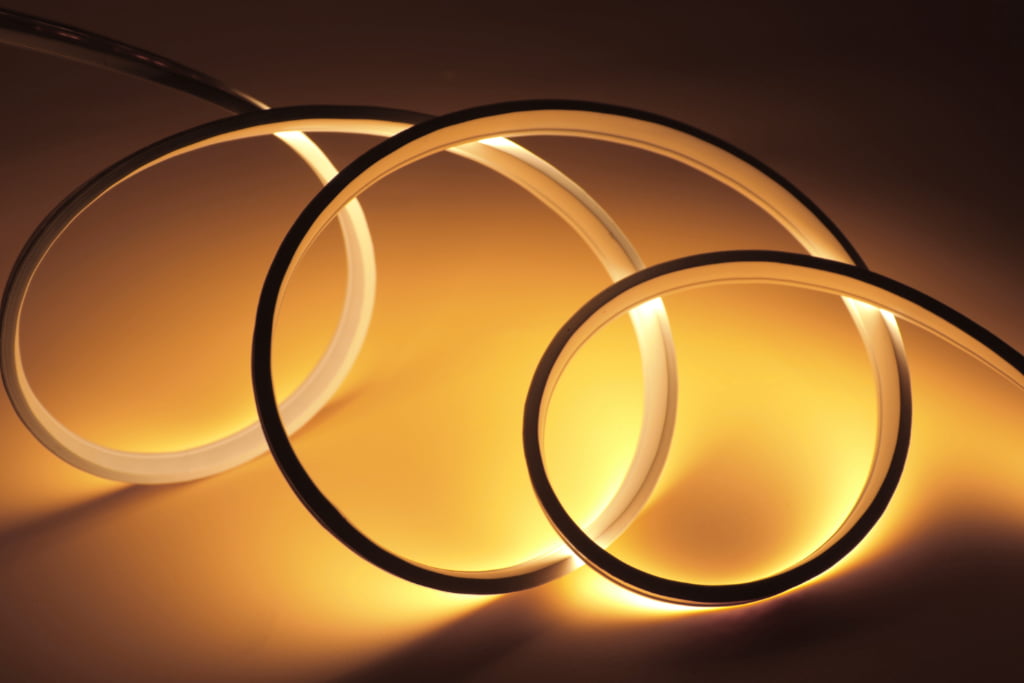
The bending direction2 of LED neon flex1 strips is crucial for proper installation. There are two types: Top-bend3 for vertical flexibility and Side-bend4 for horizontal flexibility. Using the wrong type or exceeding bend radius5 limits can cause internal circuit damage.

When I looked at those photos, I immediately knew it wasn't a quality issue but rather incorrect bending direction2 or excessive force at the corner. This common misunderstanding about "flexibility" leads to many installation failures. Let me explain why.
What's the Difference Between Top-Bend and Side-Bend LED Neon Flex?
Many installers assume "flexible" means the strip can bend in any direction like a noodle. This misconception often leads to costly mistakes and project delays.
Top-bend3 LED neon flex1 is designed to flex up and down vertically, while Side-bend4 versions flex left and right horizontally. Each type has a specific internal PCB structure6 optimized for its intended bending direction2.

Dive deeper: The structural design of LED neon flex1 is more complex than it appears. The PCB inside acts like a backbone, determining how the strip can move. Here's why choosing the right type matters:
Top-Bend Applications
- Vertical surface mounting
- Building outline lighting
- Letter formation (vertical strokes)
- Column wrapping
Side-Bend Applications
- Horizontal surface mounting
- Channel letter backlighting
- Logo creation (horizontal curves)
- Contour lighting
| Feature | Top-Bend | Side-Bend |
|---|---|---|
| Bending Direction | Vertical (Up/Down) | Horizontal (Left/Right) |
| Typical Applications | Building outlines, Vertical letters | Logo designs, Horizontal curves |
| Min. Bend Radius | ~10mm | ~10mm |
| PCB Structure | Vertical flex design | Horizontal flex design |
Why Does Incorrect Bending Cause Failure?
When installers force a Top-bend3 strip to make horizontal turns, or vice versa, it creates devastating internal stress on the PCB circuit.
Forcing LED neon flex1 to bend against its designed direction causes copper foil micro-cracks and solder joint failures, leading to immediate or eventual circuit breaks. This explains why strips often fail right after corner installations.

Dive deeper: We've engineered our LED neon flex1 with enhanced durability features to prevent such failures:
Advanced PCB Design
- Using 3oz rolled copper PCB instead of standard electrolytic copper
- Better elongation properties
- Higher resistance to fatigue cracking
- Improved flexibility in designed bending direction2
Installation Considerations
-
Pre-installation Planning
- Review mounting surface layout
- Identify all turning points
- Calculate required lengths
-
Material Selection
- Choose correct bending type
- Verify minimum bend radius5
- Consider pre-made corner sections
-
Installation Best Practices
- Use proper mounting clips
- Maintain consistent spacing
- Allow for thermal expansion7
What Should You Do Before Ordering LED Neon Flex?
Professional LED neon flex1 projects require careful planning and the right product selection from the start.
Before placing an order, provide your supplier with installation layout drawings or detailed descriptions of corner transitions. This allows them to recommend the correct bending type and possibly suggest pre-made corner sections.

Dive deeper: Our pre-order consultation8 process includes several critical steps to ensure project success:
-
Project Analysis
- Review architectural drawings
- Identify mounting surfaces
- Map out light paths
- Note all turning points
-
Product Recommendations
- Specify correct bending type
- Calculate optimal lengths
- Suggest mounting methods
- Design custom corners if needed
-
Installation Support
- Provide detailed instructions
- Share best practices
- Offer technical support
- Document warranty requirements
This comprehensive approach helps prevent installation issues and ensures long-term performance. We've found that spending extra time in the planning phase significantly reduces on-site complications and callback rates.
Conclusion
Success with LED neon flex1 installations isn't about brightness or color - it's about choosing the right structural design for your application. Professional suppliers don't just sell lights; they help prevent installation problems before they occur.
Explore this link to understand the versatility and applications of LED neon flex in various projects. ↩
Learn about the significance of bending direction to avoid installation failures and ensure optimal performance. ↩
Discover the specific uses of Top-bend LED neon flex and how it can enhance your projects. ↩
Find out how Side-bend LED neon flex can be effectively utilized in various lighting designs. ↩
Get insights on the minimum bend radius to ensure safe and effective installation of LED neon flex. ↩
Understand the role of PCB structure in LED neon flex and its impact on flexibility and durability. ↩
Learn about the importance of accounting for thermal expansion in LED neon flex projects to prevent failures. ↩
Discover the benefits of a pre-order consultation to ensure you select the right products for your project. ↩