
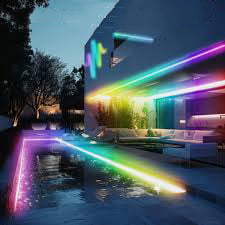
Many luxury commercial projects aim for a flowing, seamless lighting effect. Yet, they often end up with cheap-looking rainbow spots on surfaces. I've seen this issue frustrate countless designers and clients.
The key to avoiding rainbow spots with top bending RGBW LED strips1 lies in their optical structure design. You need dual-color co-extrusion2, high-density LED placement (84-96 LEDs/m), and proper silicone diffusion thickness3 (≥3mm) for complete color mixing.

When it comes to high-end commercial lighting, the difference between amateur and professional results often comes down to understanding the technical details. Let's explore why some top bending LED strips create disappointing effects and how to choose the right ones.
Why Do Some Top Bending LED Strips Show Visible Color Spots?
I recently visited a luxury hotel lobby where the architect was frustrated by visible rainbow dots on their curved walls. The expensive control system wasn't the problem - it was the LED strip's basic structure.
Rainbow spots appear when the LED strip's silicone diffusion rate is insufficient or LED spacing is too wide. This prevents proper mixing of the RGBW wavelengths before light emission, resulting in visible individual color points rather than smooth blending.

Let's dive deeper into the technical aspects that cause this issue:
1. The Role of Optical Structure
The optical structure of top bending LED strips is crucial for proper color mixing. Here's why:
| Component | Poor Design | Professional Design |
|---|---|---|
| Silicone Layer | Single layer extrusion | Dual-color co-extrusion |
| Diffusion Material | Basic silicone | Nano-particle enhanced |
| Light Mixing Space | < 2mm | ≥ 3mm |
| Beam Angle | < 120° | 160° |
The professional design allows for:
- Complete separation of structural and optical layers
- Enhanced stability and consistency
- Superior color mixing in limited space
- Wide-angle uniform illumination
When these elements are properly engineered, the result is seamless color transitions without visible dots, even under high-resolution photography or close-up viewing.
How Can You Test LED Strip Quality Before Installation?
After seeing numerous project failures, I've learned that lab specifications alone aren't enough to guarantee real-world performance.
Quality assessment requires hands-on testing of actual samples. Look for uniform color mixing at different viewing angles, take close-up photos, and examine the strip's performance in your specific installation environment.

Let's examine the key testing criteria:
Essential Quality Indicators
Quality verification involves multiple factors:
| Test Parameter | Minimum Standard | Optimal Performance |
|---|---|---|
| LED Density | 60 LEDs/m | 84-96 LEDs/m |
| Color Mixing Distance | 5mm | 3mm or less |
| Viewing Angle | 120° | 160° |
| Color Consistency | ±50K | ±25K |
Professional manufacturers should provide:
- Sample testing under various lighting conditions
- Close-up photography of illuminated strips
- On-site mockup installation if required
- Detailed technical documentation
These real-world tests reveal performance issues that specifications alone might miss, ensuring your project achieves the desired premium aesthetic.
Conclusion
Achieving professional results with top bending RGBW LED strips1 requires understanding both technical specifications and optical design principles. Choose manufacturers who demonstrate their quality through actual testing rather than just specifications.
Explore this link to understand the technology behind top bending RGBW LED strips and their benefits for seamless lighting. ↩
Learn about dual-color co-extrusion and how it enhances color mixing in LED strips for professional results. ↩
Discover the importance of silicone diffusion thickness in achieving smooth color transitions in LED lighting. ↩