
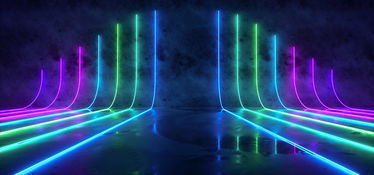
Installing LED neon flex seems straightforward, but I've seen countless projects fail due to overlooked technical details. These mistakes often lead to light decay1, uneven illumination, and costly reinstallations.
To successfully install 5m Neon Flex 6mm Winged strips, focus on four key aspects: LED density2 (minimum 120 LEDs/m), FPC copper thickness3 (2oz recommended), proper heat dissipation design4, and precise installation channel specifications5. These factors ensure stable brightness and uniform illumination.

After years of working with LED neon flex installations, I've identified several critical issues that often catch people off guard. Let me share how to avoid these common pitfalls and ensure your installation stands the test of time.
How Can You Prevent Light Decay and Brightness Instability?
I once saw a brand signage project fail within two months because they used low-density LEDs and thin FPC. The initially brilliant display became noticeably dimmer and uneven, disappointing both the client and installer.
To prevent light decay1, use LED strips with at least 120 LEDs/m and double-sided 2oz copper thickness FPC. This combination ensures stable brightness across the entire 5-meter length and extends the product's lifespan significantly.

When it comes to preventing light decay1 and maintaining brightness stability, several technical factors need to be considered. The relationship between LED density2, power supply6, and heat dissipation forms a complex system that directly impacts performance. Here's a detailed breakdown:
LED Density Considerations
- Optimal Spacing: 8.33mm between LEDs (120 LEDs/m)
- Light Distribution: Even coverage without dark spots
- Power Consumption: Balanced for long-term stability
FPC Design Requirements
| Parameter | Specification | Benefit |
|---|---|---|
| Copper Thickness | 2oz | Better heat dissipation |
| Circuit Design | Double-sided | Enhanced current distribution |
| Width | 6mm | Optimal for heat spread |
These specifications ensure your installation maintains consistent brightness throughout its lifetime while preventing common issues like hotspots and uneven aging.
How Do You Eliminate Visible LED Dots and Achieve Smooth Illumination?
A high-end retail window display project initially showed obvious LED dots, especially at corners, ruining the premium look the client wanted. This common issue stems from inadequate diffusion design7.
To achieve smooth illumination without visible dots, combine high-density LED placement (120+ LEDs/m) with optimized silicone diffusion layers. Test sample sections first, particularly for curved installations8, to ensure uniform light distribution.

The science of light diffusion in LED neon flex involves multiple layers working together. Understanding these components helps achieve optimal results:
Diffusion Layer Structure
-
Primary Diffusion Layer
- Direct LED coverage
- Initial light spreading
-
Secondary Diffusion Layer
- Further light homogenization
- Surface texture optimization
Critical Measurements
| Element | Specification | Purpose |
|---|---|---|
| Diffusion Distance | 3-4mm | Optimal light mixing |
| Surface Treatment | Micro-texturing | Enhanced diffusion |
| Layer Thickness | 1.2-1.5mm | Balance of flexibility and diffusion |
This layered approach ensures complete elimination of visible LED dots9 while maintaining the desired brightness level.
What's the Secret to Proper Heat Dissipation and Extended Lifespan?
I witnessed a hotel installation fail prematurely because of inadequate heat management. The continuous operation led to accelerated light decay1 and color shifting, requiring expensive replacement within months.
Design heat dissipation channels into the mounting system and match FPC copper thickness3 with power requirements. For 5-meter runs, include thermal breaks every 2.5 meters and ensure adequate airflow around the installation.

Heat management in LED neon flex installations requires a systematic approach. Consider these technical aspects:
Thermal Management Strategy
-
Heat Generation Points
- LED junction temperature
- FPC current flow
- Power supply location
-
Dissipation Methods
- Conductive transfer
- Convective cooling
- Radiative release
Temperature Control Matrix
| Component | Temperature Limit | Monitoring Method |
|---|---|---|
| LED Junction | 85°C max | Thermal imaging |
| FPC Surface | 65°C max | Contact measurement |
| Ambient Air | 45°C max | Environmental monitoring |
Conclusion
Success with Neon Flex 6mm Winged installations requires attention to LED density2, proper heat management, and precise installation techniques. Following these guidelines will ensure long-lasting, professional results.
Understanding the causes of light decay can help you implement strategies to maintain brightness and quality. ↩
Understanding LED density is crucial for achieving stable brightness and avoiding light decay in your projects. ↩
Learn how the right copper thickness can enhance heat dissipation and prolong the lifespan of your LED installations. ↩
Explore innovative heat dissipation designs to ensure your LED installations perform optimally and last longer. ↩
Discover the best practices for installation channels to achieve uniform illumination and prevent common pitfalls. ↩
Understanding the relationship between power supply and LED performance is key to achieving stable and reliable lighting. ↩
Explore how effective diffusion design can enhance light quality and eliminate dark spots in your installations. ↩
Discover the unique challenges of curved installations and how to overcome them for optimal results. ↩
Find out effective methods to achieve smooth illumination and enhance the aesthetic appeal of your lighting projects. ↩