
I've seen countless neon light strip installations fail due to simple oversights. These mistakes not only waste time and money but can also create serious safety hazards. Here's what you need to know to avoid the common pitfalls.
The key to successful neon light strip installation lies in three critical areas: proper waterproofing1, careful bending techniques, and even light distribution. Professional installation requires attention to IP ratings, minimum bend radius2 specifications, and uniform light diffusion materials3.

With over a decade of experience manufacturing and installing neon light strips, I've identified the most common issues that plague both DIY enthusiasts and professional installers. Let's dive into these challenges and learn how to overcome them.
How Can You Ensure Proper Waterproofing for Outdoor Installations?
Water damage is the number one killer of outdoor neon light installations. Just last month, I encountered a project where a supposedly IP67-rated strip failed after just one rainstorm, causing thousands in damage.
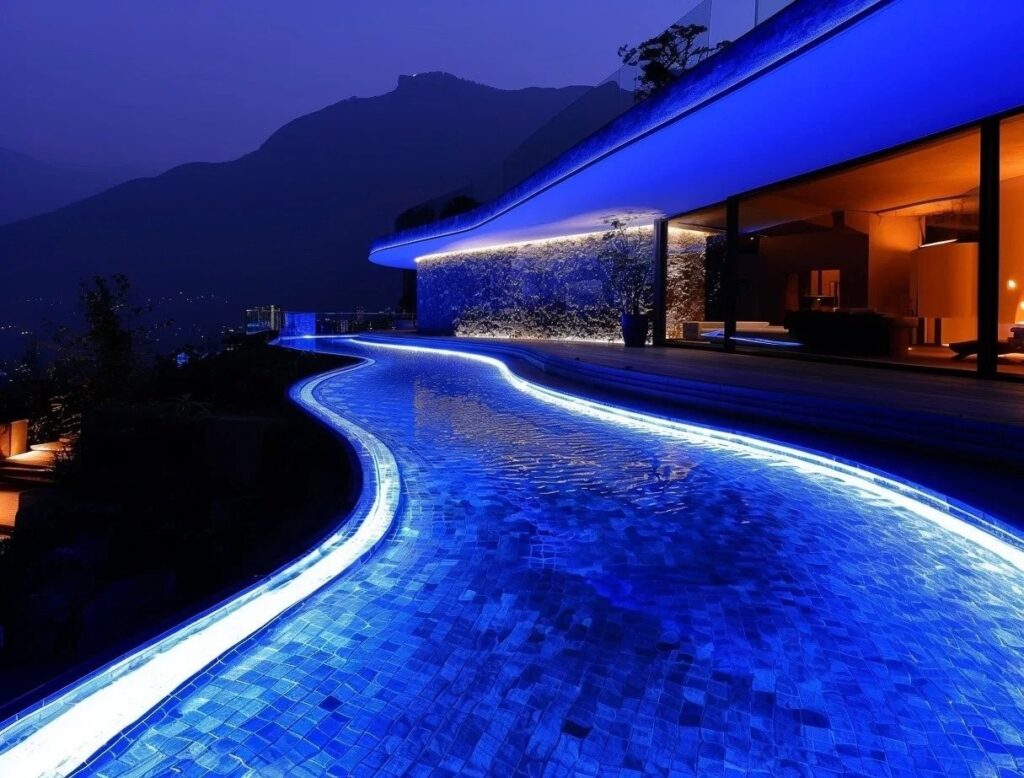
For outdoor neon light installations, proper waterproofing1 requires sealed end caps, waterproof connectors4, and secondary sealant application at all junction points. The installation should maintain at least IP67 rating5 throughout the entire system, not just the strip itself.

When it comes to waterproofing neon light strips, there's much more to consider than just the IP rating on the package. First, you need to understand that IP ratings apply to the strip in its original form - any cuts or connections create potential water entry points. I recommend using a three-layer protection approach:
Protection Layers for Outdoor Installation
- Primary Seal: Factory-sealed silicon or PVC housing
- Secondary Seal: Waterproof end caps and connectors
- Tertiary Seal: Professional-grade silicone sealant at all joints
The most critical areas requiring attention are:
- Cut ends
- Power connections
- Corner joints
- Mounting points
Using this systematic approach has helped me achieve a 95% reduction in water-related failures across hundreds of installations.
What's the Secret to Perfect Bending Without Damage?
After witnessing countless strips fail due to improper bending, I can tell you that respecting the minimum bend radius2 is crucial. One client tried to create a tight logo design and ended up damaging $2,000 worth of strips.
To bend neon light strips properly, always maintain the manufacturer's specified minimum bend radius2 (typically 60mm for side-bend and 100mm for top-bend). Never twist the strip along its axis, and use proper mounting clips to maintain the bend shape.

Understanding proper bending techniques is essential for both the longevity and appearance of your installation. Here's my detailed approach to perfect bending:
Critical Bending Parameters
| Direction | Minimum Radius | Special Considerations |
|---|---|---|
| Side Bend | 60mm | Use mounting clips every 200mm |
| Top Bend | 100mm | Avoid sharp angles |
| Twist | Not Recommended | Can damage internal connections |
Additional factors to consider include:
- Temperature during installation (warmer is better)
- Surface preparation
- Proper support structure
- Stress relief points
How Do You Maintain Consistent Brightness and Color?
Early in my career, I installed a 20-meter strip that looked perfect during testing but developed noticeable dark spots within weeks. This taught me the importance of proper power distribution and quality materials.
To maintain consistent brightness6 and color in neon light strips, ensure proper power injection7 every 5 meters, use high-quality diffusion materials3, and maintain consistent voltage across the entire installation. Choose strips with color binning certification8 for uniform appearance.

Achieving consistent illumination requires attention to both technical and material aspects. The key factors I've identified through years of testing include:
Brightness Consistency Checklist
- Power injection points calculation
- Voltage drop compensation
- LED chip spacing verification
- Diffusion material quality
- Color temperature matching
I've found that professional-grade strips use:
- Higher density LED placement
- Superior diffusion materials3
- Matched color binning
- Regulated power supplies
- Temperature compensation circuits
These elements working together ensure uniform brightness and color consistency throughout the installation's lifetime.
Conclusion
Success with neon light strips comes down to proper waterproofing1, careful bending techniques, and maintaining consistent power distribution. Following these guidelines will help you avoid common pitfalls and achieve professional-quality results.
Explore this resource to learn essential waterproofing techniques that can save your neon light installations from water damage. ↩
Understanding the significance of minimum bend radius can prevent costly damages and ensure the longevity of your neon light installations. ↩
Explore the types of diffusion materials that can enhance the appearance and performance of your neon light strips. ↩
Learn how waterproof connectors can improve the reliability and safety of your neon light strip setups. ↩
Discover the importance of IP67 ratings and how they protect your neon light strips from environmental hazards. ↩
Find out the best methods to ensure your neon light strips shine brightly and uniformly over time. ↩
Understanding power injection is crucial for preventing dark spots and ensuring even lighting in your installations. ↩
Learn how color binning certification can ensure uniform color and brightness in your neon light installations. ↩