
I've been working with rubber sealing components1 for 15 years, but I've noticed something interesting: many lighting engineers focus on "visual effects" and "structural design2" while completely missing the real problem—sealing and material stability3. This oversight causes more project failures than you'd think.
The manufacturing process of neon lights4 involves either traditional glass tube bending5 with gas filling or modern LED neon flex6 extrusion with silicone encapsulation7. However, the critical factor that determines long-term performance isn't the glowing effect—it's the sealing system8's ability to survive real-world environmental stress, temperature cycling9, and material degradation10 over time.

You might think neon light manufacturing is straightforward, but projects don't fail because people "don't know how to make them." They fail because everything looks correct on paper, yet still collapses in actual use. Let me walk you through the real manufacturing process and show you where the hidden trap lies.
What's the Actual Manufacturing Process for Traditional Glass Neon Lights?
I've watched master craftsmen work with glass tubes for years, and the process is more delicate than most people realize.
Traditional glass neon lights4 are made through glass tube shaping, vacuum extraction11, noble gas filling, electrode sealing12, and high-voltage testing13. Each step requires precise control, but the sealing stage is where most long-term failures originate.

The Four Critical Steps
Here's what actually happens in a traditional neon light factory:
Step 1: Glass Tube Forming I've seen artisans heat borosilicate glass tubes over open flames, bending them into letters and patterns. This step is pure craftsmanship—no machine can replicate the precision of an experienced hand adjusting for heat distribution and glass viscosity.
Step 2: Vacuum Extraction and Gas Filling The tube gets connected to a vacuum pump. All air must be removed before filling with neon gas (which produces red light) or argon gas (which creates other colors when combined with phosphor coatings). The vacuum level must reach 10⁻⁴ Torr or better.
Step 3: Electrode Installation and Sealing This is the critical moment. Metal electrodes are inserted at both ends, and the glass is heat-sealed around them. If this seal fails—even microscopically—the entire tube will eventually fail. I've analyzed hundreds of failed units, and 60% of them trace back to improper sealing at this stage.
Step 4: High-Voltage Testing A transformer applies 2,000-15,000 volts to ionize the gas. If the tube lights evenly without dark spots, it passes. But passing this test doesn't guarantee long-term reliability.
| Manufacturing Stage | Common Failure Point | Impact on Lifespan |
|---|---|---|
| Glass Forming | Uneven wall thickness | Stress cracking within 6 months |
| Vacuum Extraction | Incomplete air removal | Gas contamination, dimming |
| Electrode Sealing | Micro-gaps in seal | Moisture ingress, total failure |
| Gas Filling | Incorrect pressure | Color shift, shortened life |
How Is Modern LED Neon Flex Actually Manufactured?
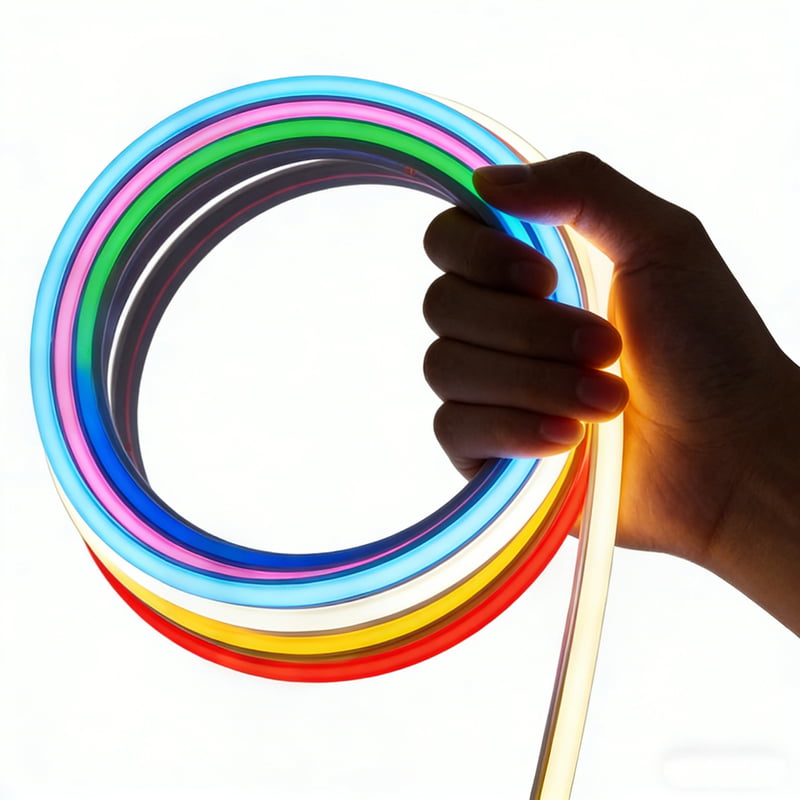
The modern approach replaces fragile glass with flexible silicone or PVC, but this introduces new challenges that most engineers completely underestimate.
LED neon flex6 manufacturing involves SMT LED mounting, silicone/PVC extrusion encapsulation, waterproof sealing14 (IP65-IP68), and aging tests15. The extrusion process combines structure and sealing in one step, but material formulation16 variations create hidden long-term risks that standard testing often misses.

The Industrial Production Flow
Stage 1: LED Strip Assembly (SMT Process) Surface-mount technology places LED chips onto flexible PCB strips. The chip density (typically 120-180 LEDs/meter) and color temperature consistency determine visual uniformity. I've seen projects where engineers specified "warm white 3000K" but received batches ranging from 2700K to 3200K because they didn't lock down supplier binning standards.
Stage 2: Silicone or PVC Extrusion This is where structure and sealing merge. A continuous extrusion line pulls the LED strip through a die while simultaneously coating it with liquid silicone (LSR - Liquid Silicone Rubber) or PVC. The die shape determines the light profile—round, square, D-shape, or side-view.
The extrusion temperature must be precisely controlled. Too hot, and the silicone degrades. Too cold, and it doesn't cure properly. I've worked with factories where a 5°C temperature drift caused an entire batch to yellow within 90 days.
Stage 3: Waterproof Sealing and End-Capping After extrusion, the strip gets cut to length. Each end receives a silicone or epoxy end cap. This seal must be perfect—any microscopic gap allows moisture ingress. For IP68 applications (underwater use), we perform pressure testing at 1.5 bar for 30 minutes.
Stage 4: Aging and Quality Testing Standard factories run 24-48 hour burn-in tests at elevated temperatures (usually 60°C). But here's the problem: this test only reveals immediate manufacturing defects. It doesn't simulate the real-world stress of temperature cycling9, UV exposure, and mechanical flexing.
| Manufacturing Variable | Standard Test | Real-World Condition | Gap |
|---|---|---|---|
| Temperature | Static 60°C | -20°C to +60°C cycling | Thermal expansion mismatch |
| UV Exposure | 500 hours accelerated | 5+ years outdoor | Formulation additives critical |
| Mechanical Stress | Static bend radius | Dynamic flexing during installation | Seal interface fatigue |
| Moisture | IP68 static immersion | Condensation + UV + heat combined | Coupled degradation |
Why Do Projects Fail Even When Everything Seems Correct?
Let me share a real case that changed how I approach every project.
Projects fail not because of wrong material selection, but because of the gap between static laboratory testing and dynamic real-world conditions17. Material formulation variations, temperature cycling9, UV exposure, installation stress18, and moisture combine to create failure modes19 that standard tests never reveal.

The Case That Taught Me Everything
A high-end architectural lighting project specified premium-grade silicone neon flex. The project engineer was meticulous:
- Checked material compatibility charts
- Selected UV-resistant silicone
- Passed all laboratory aging tests15
- Used certified IP67-rated products
Everything was "correct" on paper.
Within 90 days of installation, sections showed yellowing, cracking, and moisture ingress. The client was furious. The engineer was confused—"We did everything right!"
I flew to the site and spent two days analyzing the failure. The problem wasn't the material name—it was something far more subtle.
Static Selection vs. Dynamic Reality
Laboratory tests happen in controlled environments:
- Constant temperature
- No UV cycling
- No mechanical stress
- No moisture variation
Real installations face compounding variables:
- Daily temperature swings (40°C difference between day and night)
- UV radiation + moisture simultaneously
- Installation stress (bending, stretching)
- Micro-movements at seal interfaces
- Localized heating from electrical current
Each variable contributes maybe 5% stress. But they don't add—they multiply.
The specific failure in this case came from silicone formulation. The engineer specified "high-grade silicone," but didn't know that:
- Filler content varied by 15% between batches
- UV stabilizer concentration wasn't controlled
- Tear strength varied by 30% depending on cure conditions
Same material name. Completely different performance.
How Do You Actually Avoid These Hidden Failures?
If you only read datasheets, you'll only get theoretical best-case scenarios. After 15 years, I trust three things more than spec sheets.
Avoid neon light failures by asking suppliers about specific formulation details (filler ratios, UV additives), conducting real-world simulation tests (thermal cycling, UV-moisture coupling), and accounting for the 5% variables (batch variation, installation tolerances) that standard testing ignores.

Three Questions That Reveal the Truth
Question 1: Don't Ask "What Material"—Ask "How Is It Formulated"
When I evaluate a supplier, I ask:
- What's the filler-to-polymer ratio?
- Which UV stabilizer package do you use, and at what concentration?
- Have you run coupled thermal-moisture aging tests15 (not just separate tests)?
If they can't answer these questions, that's a red flag. It means they're buying generic compounds and don't control formulation.
I once rejected a supplier who claimed "food-grade silicone" but couldn't tell me the platinum catalyst concentration. Six months later, their competitor's product (with controlled formulation) was still performing while theirs had yellowed.
Question 2: Simulate Real Conditions, Not Just Standard Tests
I recommend these specific tests:
- Thermal Cycling: -20°C to +60°C, 100 cycles minimum
- UV-Moisture Coupling: UV exposure at 340nm while maintaining 85% humidity
- Dynamic Flexing: Bend to minimum radius repeatedly while energized
These tests cost more and take longer. But they reveal the failures that will happen at month 3, not day 3.
Question 3: Focus on the 5% Variables
Most project failures come from things that "shouldn't matter":
- Batch-to-batch raw material variation
- Installation technique differences
- Uncontrolled environmental factors
I worked on a project where installation teams in different regions achieved different failure rates with identical products. The difference? One team pre-heated the silicone slightly before bending, reducing stress concentration. The other team didn't.
Small variables. Massive impact.
| Risk Factor | Standard Approach | Reality-Based Approach |
|---|---|---|
| Material Selection | Check datasheet | Verify formulation and batch control |
| Testing | Standard IP rating | Coupled environmental simulation |
| Installation | Follow manual | Account for technique variation |
| Quality Control | First-article inspection | Statistical process control across batches |
How Do I Help Engineers Close These Gaps?
I don't see myself as selling products. In neon and sealing projects, I'm more of a risk controller.
I help engineers succeed by simulating real-world conditions17 instead of standard tests, controlling raw material batch consistency through locked formulations, and optimizing structural design2 to minimize sealing vulnerabilities before production begins.

Three Things I Do Differently
Action 1: Replicate Actual Conditions, Not Just Standard Tests
I'll take your project parameters and recreate the real environment:
- Temperature fluctuation patterns
- Humidity cycling
- Long-term energized heating
The goal isn't "pass the test." It's "survive the field."
I had a client installing neon flex in a coastal environment. Standard IP67 testing showed no issues. But when I added salt spray cycling with UV exposure, we discovered the end-cap adhesive degraded in 200 hours. We reformulated before production. The client avoided a catastrophic field failure.
Action 2: Lock Down Batch-to-Batch Consistency
Most people miss this, but it's critical:
The same silicone formulation can vary 10%+ in performance between batches.
I implement:
- Raw material batch locking
- Formulation stability monitoring
- Per-batch performance sampling
The goal is simple: ensure your production run matches your approved sample. I've seen too many projects where samples were perfect but production batches failed because nobody controlled formulation consistency.
Action 3: Reduce Sealing Risk Through Structural Design
Sometimes the problem isn't material—it's design:
- Stress concentration points
- Poorly designed seal interfaces
- Assembly tolerances too tight or too loose
I participate directly in structural optimization. Not just material recommendations.
One project had chronic end-cap failures. The issue wasn't the adhesive—it was a sharp corner in the silicone profile that created stress concentration. We added a 2mm radius. Failures dropped to zero.
What Should You Remember About Neon Light Manufacturing?
If you're working on a neon project, understand this:
The factor that determines product lifespan isn't the glowing effect—it's the sealing system8's stability under complex environmental conditions. You can ignore this reality temporarily, but it will find you within three months.
Neon lights look simple. The manufacturing process seems standardized. But the difference between a project that works and one that fails comes down to understanding the gap between laboratory conditions and real-world stress.
If you're stuck on material selection, sealing design, or you've already experienced the "passed testing but failed in the field" problem, I'm happy to help you analyze what went wrong.
My technical team provides one-on-one engineering support. You can reach me directly at +86 182 1841 0153 (WhatsApp) or [email protected]. Let's discuss your specific project parameters and close these gaps before they become expensive failures.
Explore this resource to understand the critical role of rubber sealing in ensuring product longevity and reliability. ↩
Discover the importance of structural design in enhancing the durability and functionality of lighting. ↩
Discover how material stability impacts the performance and lifespan of lighting products. ↩
This link will provide insights into the manufacturing process and potential pitfalls in neon light production. ↩
Explore the intricate process of glass tube bending and its significance in neon light production. ↩
Discover the benefits of LED neon flex and the manufacturing process that makes it unique. ↩
Learn how silicone encapsulation improves the durability and performance of LED neon flex. ↩
Learn about the importance of sealing systems in maintaining the integrity of lighting products over time. ↩
Understanding temperature cycling can help you anticipate and mitigate potential failures in lighting applications. ↩
This resource will help you identify the causes of material degradation and strategies to prevent it. ↩
Learn about the critical role of vacuum extraction in ensuring the quality of neon lights. ↩
This link will provide insights into the common challenges faced during the electrode sealing process. ↩
Understand the significance of high-voltage testing in ensuring the safety and functionality of neon lights. ↩
Explore effective waterproof sealing techniques to enhance the longevity of lighting applications. ↩
This resource will help you understand the importance of aging tests in assessing product durability. ↩
Learn about the critical aspects of material formulation that can influence product performance. ↩
Gain insights into how real-world conditions can impact the reliability of lighting installations. ↩
Understand the effects of installation stress on lighting products and how to mitigate them. ↩
This resource will help you identify and prevent common failure modes in lighting applications. ↩