
When most professionals plan a hardwired LED strip installation, they focus on brightness and color. But the true challenge emerges years later: you've permanently sealed a heat-generating electronic system inside a structure with no thermal escape route. This oversight causes the majority of large-scale project failures I've witnessed.
Hardwired LED strip lighting requires careful system-level planning beyond just wattage and lumens. The real challenge is managing thermal expansion, voltage distribution, and material compatibility inside sealed architectural structures where heat accumulates and maintenance access is limited. Without proper thermal pathways, load reserves, and compatible mounting materials, even premium LED strips will fail prematurely—often 6-18 months after installation.

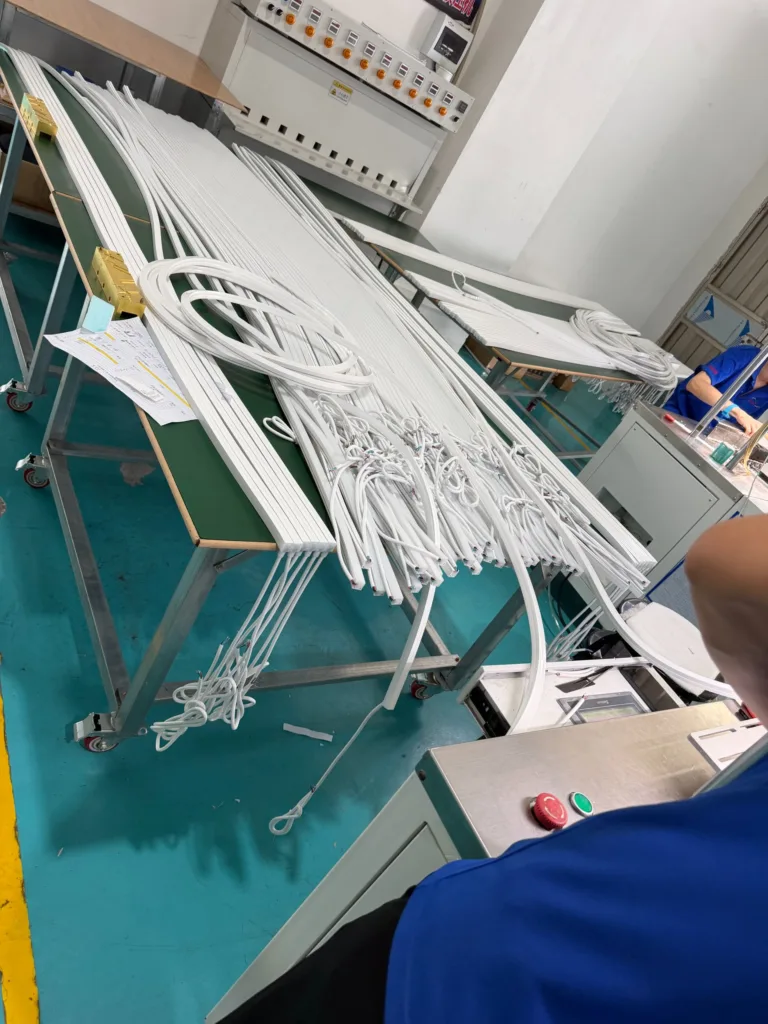
Most hardwired projects pass initial inspection easily. The problems appear later—after warranties expire, when repair costs multiply, and when replacing a single failed section means tearing apart entire ceiling structures.
Why do hardwired LED strips fail when standalone strips work fine?
When I first started working with commercial lighting projects, I assumed hardwired installations simply meant "hiding the wires for cleaner aesthetics." That misconception cost one of our retail clients a complete reinstallation.
The fundamental difference is environmental control. Standalone LED strips operate in open air with natural convection cooling and accessible power supplies. Hardwired installations trap LED strips, drivers, and connections inside sealed cavities where heat accumulates, humidity condenses, and thermal expansion has nowhere to go. This sealed environment transforms a simple lighting product into a complex thermal management system.

I worked on a North American retail chain project where the client specified high-density COB LED strips for seamless linear lighting. The sample phase looked perfect—continuous light output, smooth dimming, no visible LED dots. But we made a critical mistake in the architectural integration.
The design called for ultra-slim recessed channels. The aluminum extrusion barely had room for the LED strip itself. The driver got hidden in a sealed ceiling cavity with no ventilation. We prioritized aesthetics over thermal engineering.
For three months, everything worked perfectly. Then summer arrived. The problems started gradually, then accelerated:
| Timeline | Observable Issues | Root Cause |
|---|---|---|
| Month 4-6 | Color temperature shifts, end-section dimming | Driver thermal throttling, voltage drop under sustained load |
| Month 7-9 | Random flicker on dimming circuits | Driver capacitor degradation from sustained high temperature |
| Month 10-12 | Yellowing silicone surface, adhesive failure | VOC outgassing from sealants reacting with silicone under heat |
| Month 13+ | Complete section failures | Solder joint fatigue from repeated thermal cycling |
When we opened the installation, the LED strips themselves were still functional. The system failed because:
- The sealed cavity temperature exceeded 65°C during peak hours
- Drivers operated continuously at 90%+ rated capacity with no cooling
- Thermal expansion coefficients between aluminum, silicone, and mounting adhesive didn't match
- The adhesive outgassed VOCs that migrated into the silicone matrix
- Repeated thermal cycling created micro-cracks in PCB solder joints
Laboratory testing showed every component met specifications. But laboratory conditions don't replicate sealed architectural cavities running 12 hours daily under summer heat loads.
This is why hardwired projects fail: you test products in isolation, but you deploy systems in complex thermal environments.
How do you design thermal management for sealed LED installations?
Most specifications focus on wattage and lumens. Few address what happens when that wattage converts to heat inside a sealed cavity with nowhere to dissipate.
Effective thermal management for hardwired LED strips requires three critical design elements: adequate aluminum extrusion thickness for heat spreading (minimum 2mm wall thickness), thermal interface materials that maintain contact pressure over time, and driver load derating to 70-80% capacity with ventilation pathways. The goal is maintaining LED junction temperature below 65°C under worst-case ambient conditions.

I learned this lesson from a hotel corridor project. The original design used 10W/m LED strips in a 15mm aluminum channel. Calculations showed the aluminum could dissipate the heat. What the calculations missed was:
The aluminum channel got painted with thick architectural coating, reducing thermal emissivity. The channel got installed against gypsum board with an air gap, preventing conduction. The ceiling cavity above trapped hot air with no circulation path. The driver got buried under insulation.
Under these real-world conditions, the effective thermal resistance was 3-4 times higher than the theoretical calculation. LED junction temperatures exceeded 85°C during peak hours. Color shift appeared within six months.
The solution required system-level thinking:
Aluminum Extrusion Design
- Minimum 2mm wall thickness for thermal mass
- Direct thermal contact between LED PCB and aluminum base
- Anodized or bare aluminum surface where heat dissipation occurs
- Avoid thick paint or powder coating on heat dissipation surfaces
Thermal Interface Materials
- Use thermal conductive adhesive tape (>1.0 W/mK)
- Maintain consistent 0.2-0.3mm bondline thickness
- Avoid air gaps that act as thermal insulators
- Select adhesives chemically compatible with silicone over 10+ years
Driver Thermal Management
| Driver Capacity | Recommended Derating | Ventilation Requirement |
|---|---|---|
| 0-50W | 30% reserve capacity | Passive ventilation acceptable |
| 50-150W | 35% reserve capacity | Active ventilation or open cavity |
| 150W+ | 40% reserve capacity | Forced air circulation required |
Heat Escape Pathways
- Design ventilation slots in non-visible areas
- Create chimney effect for natural convection
- Avoid completely sealed cavities for runs >5 meters
- Monitor ambient temperature in ceiling cavities during design phase
The most critical insight: thermal management isn't about handling average conditions. It's about surviving worst-case scenarios that occur during the hottest week of the year, when HVAC systems struggle, when drivers run at full load for 14-hour retail days, when heat accumulates faster than it dissipates.
What causes voltage drop problems in long hardwired LED runs?
One of my most frustrating projects involved a luxury retail space with 30-meter continuous LED strip runs. The electrician installed everything correctly, power supplies were properly sized, but the lighting looked terrible. The front section blazed bright white. The far end glowed dim amber. RGB colors shifted progressively along the run.
Voltage drop in LED strips occurs because copper traces on the PCB have electrical resistance. As current flows through these traces over long distances, voltage decreases progressively. This causes several problems: reduced brightness at far ends, color temperature shifts (more yellow/amber), RGB color mixing errors, and increased current draw on near sections that can accelerate failure.

Most people think voltage drop just means "dimmer at the end." The actual effects are more complex:
White LED Strips
When voltage drops from 24V to 21V over a long run, the far end doesn't just dim proportionally. LEDs are current-driven devices. As voltage drops, current decreases non-linearly, and color temperature shifts toward warmer tones. A "6000K" strip might measure 5200K at the start and 4400K at the end. Your eyes immediately notice this color gradient.
RGB and RGBW Strips
The problem multiplies with RGB strips because different color channels have different forward voltage requirements:
| LED Color | Typical Forward Voltage | Voltage Drop Impact |
|---|---|---|
| Red | 2.0-2.2V | Maintains output longer as voltage drops |
| Green | 3.0-3.4V | Begins dimming at moderate voltage drop |
| Blue | 3.0-3.4V | Begins dimming at moderate voltage drop |
| White | 2.8-3.2V | Moderate sensitivity to voltage drop |
As voltage drops along the run, red LEDs maintain brightness while blue and green dim first. Your carefully programmed purple becomes pink. Your blue becomes cyan. Your white becomes warm amber. The color shift progresses along the entire run.
I've seen projects where the lighting designer spent weeks programming perfect color scenes, only to have them look completely different after installation because nobody calculated voltage distribution.
The solution requires electrical system design, not just "bigger power supplies":
Use Higher Voltage Systems
24V systems allow roughly 5-meter runs before noticeable voltage drop. 48V systems double this to 10+ meters with the same copper trace thickness. For long linear installations, 48V substantially reduces current flow (power = voltage × current), which directly reduces resistive losses.
Implement Multiple Injection Points
Rather than powering a 20-meter run from one end, inject power at 5-meter intervals. This creates multiple 2.5-meter segments powered from the center, dramatically reducing maximum voltage drop.
Increase Copper Thickness
Standard LED strips use 1-2oz copper PCBs. Upgrading to 3-4oz copper reduces trace resistance by 50-75%, but adds cost. For critical projects, this investment prevents color shift issues that cost far more to correct later.
Calculate Actual Voltage at Far End
Use this simplified formula: Voltage Drop = (2 × Length × Current × Resistance) / 1000 Where resistance depends on copper weight and trace width. For a 24V, 10W/m strip over 10 meters: approximately 2.4V drop, leaving only 21.6V at far end.
Design for Worst-Case Conditions
Calculate voltage drop at maximum brightness, not typical operating levels. If your dimming system allows 100% output, size your electrical system for 100% output across the entire run, even if you normally operate at 70%.
The most expensive voltage drop problems occur when clients install hardwired LED strips throughout an entire building, only discovering color inconsistency issues after all the architectural finishes are complete. At that point, adding power injection points means opening walls, ceilings, and conduits. The retrofit costs exceed the original installation budget.
Why do some LED strips fail while others in the same installation work fine?
I once investigated a failed hotel lighting project where 30% of LED strips in identical installations failed within 18 months, while 70% continued working perfectly. Same manufacturer, same batch, same installation method. The pattern made no sense until we examined the failure locations.
LED strip failures in identical installations usually trace to micro-environmental differences: localized heat accumulation near HVAC ducts, higher humidity in bathroom-adjacent cavities, vibration from nearby mechanical equipment, or material incompatibilities between mounting substrates and LED strip components. These environmental variations create accelerated aging conditions that only affect strips in specific locations.

The hotel project revealed the pattern. Failed strips shared common characteristics:
- Installed near HVAC supply ducts where temperature cycled repeatedly
- Located in humid zones near bathrooms and kitchens
- Mounted on powder-coated aluminum that trapped heat
- Installed with silicone adhesive that reacted with the strip's silicone extrusion
The working strips were in stable environments: consistent temperature, low humidity, good ventilation, compatible mounting materials.
Material Compatibility Issues
Hardwired installations create long-term material contact that reveals incompatibilities invisible in short-term testing:
| Material Interaction | Initial Performance | Long-Term Result (2+ years) |
|---|---|---|
| Silicone strip + Acetic acid cure silicone sealant | Perfect adhesion | Silicone softening, yellowing, adhesive failure |
| Silicone strip + PVC cable insulation | No visible issues | Plasticizer migration causing tackiness |
| Silicone strip + Certain aluminum powder coatings | Clean installation | Coating outgassing causes discoloration |
| Silicone strip + Foam tape with certain adhesives | Strong initial bond | VOC migration leads to silicone degradation |
We use food-grade silicone extrusion specifically because it resists migration and degradation. But even high-quality silicone fails when surrounded by incompatible materials that leach chemicals over months and years.
Thermal Cycling Stress
LED strips expand and contract with temperature changes. In a sealed installation, different materials expand at different rates:
- Silicone: High thermal expansion coefficient
- Aluminum extrusion: Medium thermal expansion
- Structural adhesive: Low thermal expansion
- PCB substrate: Medium thermal expansion
When a strip cycles from 20°C (night) to 60°C (day) repeatedly, these expansion mismatches create mechanical stress. After thousands of cycles, solder joints crack, adhesive bonds fail, and PCB traces fatigue.
Strips near HVAC ducts experience more severe cycling. Strips in stable environments survive longer with identical components.
Humidity and Condensation
We specify IP67-68 rated silicone LED strips for outdoor installations. But even waterproof strips fail when condensation forms inside sealed cavities. Moisture enters through cable penetrations, accumulates in cold cavities, and creates corrosion on PCB surfaces and electrical connections.
I've opened failed installations to find water droplets inside supposedly sealed aluminum channels. The water came from humidity condensing during temperature cycles, not from external water ingress.
Vibration and Mechanical Stress
LED strips installed near mechanical equipment (elevators, HVAC fans, structural elements subject to wind loading) experience constant micro-vibration. This vibration gradually fatigues solder joints and wire connections. Strips mounted with rigid adhesives transmit more vibration than strips mounted with compliant materials.
The solution requires understanding that "identical installations" aren't truly identical. Each location has unique micro-environmental conditions. Robust hardwired LED systems account for these variations through:
- Environmental assessment during design phase
- Material compatibility testing for specific installation substrates
- Mechanical stress isolation using compliant mounting methods
- Sealed cavity moisture management (ventilation or desiccants)
- Thermal cycling analysis for locations near HVAC systems
- Electrical protection for high-vibration locations
The most reliable installations succeed because they anticipate environmental variation, not because they use the most expensive LED strips.
How do you select LED strips for maintenance-hostile installations?
The worst project failure I've witnessed involved an architectural lighting installation in a museum's 12-meter-high atrium. The LED strips were embedded into custom millwork, sealed with architectural finishes, completely inaccessible without scaffolding and partial demolition. When sections failed at 14 months, the repair quote exceeded the original installation cost.
For installations where access requires scaffolding, extensive demolition, or business closure, LED strip selection must prioritize extreme reliability over initial cost. This means: doubled driver capacity reserves, reduced operating temperatures through lower LED density, military-grade solder and components, chemically inert mounting materials, and field-repairable modular architecture. A 40% higher initial cost is insignificant compared to a repair that costs 300% of the original installation.

After that museum disaster, I developed a specific evaluation framework for maintenance-hostile installations:
Design for Zero-Failure Operation
Standard commercial LED strips target 50,000-hour lifespans under laboratory conditions. Real-world installations in sealed cavities rarely achieve half that duration. For maintenance-hostile installations, I specify:
Conservative Current Density
- Use 60% of rated LED drive current
- Accept 40% lower lumens/meter in exchange for 200% longer lifespan
- Specify LED strips rated for higher power than needed, operated at reduced power
Extreme Driver Derating
- 150W rated driver for 80W actual load
- Drivers rated for 50°C ambient operating in 35°C actual ambient
- Multiple smaller drivers instead of single large drivers (failure isolation)
Redundant Design Architecture
- Parallel LED circuits so single component failure doesn't darken entire run
- Modular sections with individual connections for selective replacement
- Emergency bypass circuits for critical lighting zones
Material Selection for Decade-Plus Operation
Standard LED strips use materials selected for cost and 3-5 year lifespans. Maintenance-hostile installations require materials proven for 10+ years:
| Component | Standard Grade | Maintenance-Hostile Grade |
|---|---|---|
| Silicone Extrusion | Standard LSR | UV-stabilized, high-tear-strength LSR with anti-migration additives |
| PCB | 1-2oz copper, FR4 | 3-4oz copper, high-Tg FR4, conformal coating |
| Solder | SAC305 lead-free | High-reliability solder with elevated reflow temperature |
| Connectors | Standard terminals | Gold-plated, sealed connectors with mechanical locking |
| Drivers | Standard industrial | Conformal coated, extended temperature range, aluminum electrolytic capacitors replaced with polymer |
We source components that cost 35-45% more, but survive thermal cycling, humidity exposure, and sustained operation that destroys