

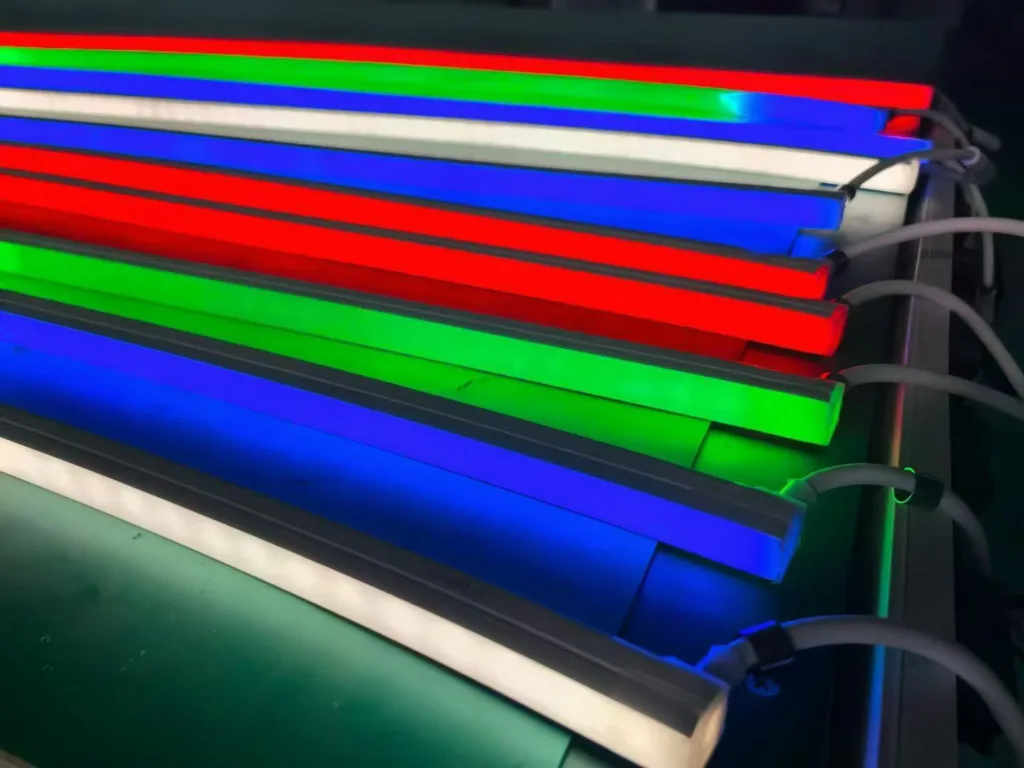
Neon sign colors seem like a straightforward design decision. But on large commercial, hospitality, and architectural projects, a vague color call in week one quietly compounds into a five-figure rework bill at final acceptance. The real question is not which color to pick — it is how precisely you define it before a single meter of LED neon flex ships.
Choosing neon sign colors correctly means building a complete control chain from design intent to final visual acceptance. A color name like "Blue" or "Warm White" is only a design intent marker, not an engineering standard. Without a reference sample, defined observation conditions, batch controls, and a pre-agreed acceptance method, the same color specification can produce visually different results across zones, backgrounds, and production batches — creating costly rework disputes at the end of a project.

Most buyers encounter this problem only after large-scale installation is complete — when the gap between the render and reality is impossible to ignore. The sections below break down exactly why this happens and what a rigorous color selection process actually looks like in practice.
Why Does Neon Sign Color Selection Go Wrong on Large Projects?
Color disputes on lighting projects rarely start with a bad product. They start with a missing definition. Every stakeholder carries a slightly different mental model of "blue," and no one discovers the gap until the scaffolding comes down.
The root cause is that color passes through multiple transformation stages between a designer's screen and a building facade. Each stage introduces variables — LED spectral output, silicone diffusion, mounting distance, background material, ambient light, and viewing angle — none of which a color name alone can control.

Understanding each transformation stage is what separates a color specification that survives procurement from one that collapses at site acceptance.
The Transformation Chain No One Draws on a Spec Sheet
When a designer labels a zone "Blue LED Neon Flex" on a drawing, the color travels through this chain before a human eye evaluates it:
- LED chip spectral output — varies by manufacturer, bin tolerance, and forward voltage
- PCB density and drive current — affects brightness and perceived hue
- Silicone sleeve optical properties — diffusion grade alters saturation and edge softness
- Mounting distance and reveal depth — changes how light washes across a surface
- Background material reflectance — dark stone absorbs; light cladding bounces
- Ambient and competing light sources — streetlights, shop fronts, sky glow
- Viewing angle and observer distance — near-field and far-field perception differ
Every step is a variable. A specification that controls only the first step — "Blue" — leaves the remaining six uncontrolled.
Why Each Party Believes They Are Correct
On a real project, the four main parties typically operate from four entirely different color references:
| Stakeholder | Reference They Use |
|---|---|
| Designer | Visual color on a render or screen |
| Procurement | Product color name or SKU |
| Supplier | Product standard, as shipped |
| Client / Owner | Final on-site visual impression at night |
None of these four references automatically align. A project that never forces them into alignment is carrying latent color risk from day one — regardless of how well every other aspect of procurement is managed.
What Does "Defining a Neon Sign Color" Actually Require?
Most specifications stop at the color name. A rigorous specification goes several layers deeper. The goal is to answer one question that every stakeholder can use consistently: what does "acceptable" look like, and under what conditions is it judged?
A complete neon sign color definition requires at minimum: a color name or category, a physical reference sample, key parameters where precision is needed (such as color temperature for white-light products), an allowable tolerance, a defined observation distance and background, and a stated acceptance environment — typically nighttime, on the actual or representative installation surface.

Each element plays a different role in the control chain. Removing any one of them leaves a gap that will be exploited — unintentionally — by the natural variation that exists across suppliers, batches, and installation environments.
Breaking Down Each Element of a Color Specification
Color Name or Category
This is the starting point, not the endpoint. "Royal Blue," "Ice Blue," and "Deep Blue" are all "blue." On a 2,000-meter facade installation, the visual difference between them is not subtle.
For simple decorative projects, a color name may be sufficient. For commercial facades, hotel exteriors, branded retail chains, and civic landmark projects, it is not.
Physical Reference Sample
A physical sample is the single most important anchor in the specification. It eliminates the ambiguity that words and screen images cannot resolve.
A properly managed reference sample record should include:
- Sample number or code
- Supplier name and product model
- Production batch reference
- Observation conditions used for approval
- Date of approval
- Names and roles of approving parties
- Whether the sample governs production color
Without these records, a "Sample Approved" stamp on a purchase order means very little in a post-installation dispute.
Color Parameters
For white-light products, color temperature (CCT) and CRI are the most relevant parameters. "Warm White" without a CCT range can mean anything from 2700K to 3500K depending on the supplier. That range is visible to the naked eye, especially on large surfaces.
For saturated colors (red, blue, green, amber), chromaticity coordinates can provide objective measurement references where high precision is required. Most architectural lighting projects working with a trusted supplier and a well-managed reference sample do not need laboratory-level chromaticity reporting for every batch — but knowing that the option exists is useful for high-stakes projects.
Allowable Tolerance
Specifying a target without a tolerance creates a binary outcome: perfect or disputed. A tolerance range gives the supply chain a realistic target and gives acceptance inspectors a clear pass/fail criterion.
For white-light products, a CCT tolerance of ±150K to ±200K is a reasonable starting point for most architectural applications. Tighter tolerances increase cost and supply chain difficulty; looser tolerances may produce visible variation at close range.
Observation Conditions
This is the most commonly omitted element — and the one that generates the most disputes.
Observation conditions should specify:
- Time of day — nighttime is typically the primary evaluation condition for neon signage
- Background surface — specify the actual or representative cladding material
- Observation distance — primary viewing distance for the intended audience
- Observation angle — straight-on, oblique, or both
- Competing light sources — whether adjacent lighting is on or off during acceptance
A supplier whose product passes a daytime office inspection but fails a nighttime on-site review is not necessarily providing a substandard product. The inspection condition was simply wrong.
How Does Color Risk Compound Across a Project Timeline?
I find that most project managers assume color problems are caught early. In practice, the opposite is true. Color problems are structurally designed to be invisible until late in a project — because each phase appears to confirm that everything is on track.
Color risk compounds across a project because each phase uses a different reference point. Design confirms color on screen. Procurement confirms a product name. Sample approval confirms appearance in an office environment. Bulk production ships. Site installation proceeds. Only at large-scale nighttime acceptance does the cumulative gap between all these partial confirmations become visible — at which point corrective action is maximally expensive.

A Phase-by-Phase Risk Map
Design Phase
The designer marks a facade zone "Blue Neon." The intent is clear to everyone in the room. No one asks:
- Which blue?
- Judged against what reference?
- Under what conditions?
The project moves to procurement with a design intent, not an engineering standard.
Risk level at this stage: low visibility, high latent risk.
Procurement Phase
Procurement requests "Blue LED Neon Flex." The supplier provides a compliant product. Price, dimensions, IP rating, and power consumption all check out.
From a procurement standpoint, the requirement is met. But the color has been confirmed only by name — not by any controlled visual or parametric standard.
Risk level: accumulating, but still invisible.
Sample Approval Phase
A one-meter sample is shipped. The design team reviews it in a conference room under artificial lighting, held against a white wall. They approve it.
The sample review has confirmed that the product produces a blue light. It has not confirmed:
- How that blue reads against dark stone cladding from 40 meters
- How it reads against light-colored cladding from the same distance
- How it reads when 200 meters of continuous strips are installed end to end
- How it reads when the second production batch has a 3% LED bin shift
Risk level: approval creates a false sense of closure.
Installation Phase
Hundreds of meters of neon flex are installed. The first visible symptom appears: the blue on the hotel entrance — light marble background — looks noticeably brighter and cooler than the blue on the retail podium, which uses dark granite.
The product is identical. The background is not. Nobody defined the background as part of the acceptance condition.
Risk level: problem is now visible, but scope is unclear.
Acceptance Phase
The client stands in front of the building at night. The render showed a rich, saturated blue wrapping the entire facade. The building shows two slightly different blues on different zones, neither of which quite matches the render.
Every party is technically correct:
- The designer specified blue
- Procurement ordered blue
- The supplier delivered blue, matching the approved sample
- The contractor installed exactly what was specified
But the client is looking at a result that does not match their expectation — and no document in the project defines what the correct outcome should have looked like.
The dispute that follows is not really about color. It is about the absence of a specification that could have resolved the question before installation began.
What Does a Successful Neon Sign Color Control Process Look Like?
The most effective approach I have seen — and the approach I would recommend to any project buyer working with large quantities of LED neon flex — does not rely on tighter product tolerances. It relies on defining acceptance criteria before the first sample is ordered.
A successful neon sign color control process establishes the acceptance standard at the design stage, validates it through a physical mock-up under real installation conditions, embeds it into procurement documents, controls it across production batches, and applies it consistently at final acceptance. Every subsequent decision is tested against this pre-agreed standard — not against anyone's memory of what the render looked like.

The Ten-Step Control Framework
The following framework is directly applicable to large commercial, hospitality, and architectural neon sign projects.
Step 1 — Pre-Procurement Color Definition
Owner: Design team + client Timing: Before the tender document is issued Output: Clear determination of whether the color specification is a design intent marker or an engineering acceptance standard. If the latter, define what "acceptable" means in terms that every downstream party can apply.
Step 2 — Technical Specification
Owner: Lighting designer + project technical lead Timing: Tender document preparation Output: A color specification that includes name, reference sample requirement, relevant parameters, tolerance, observation conditions, and acceptance method.
Do not release a tender document that only contains a color name. Procurement teams cannot turn a design intent into an engineering standard — that step must happen in the design phase.
Step 3 — Supplier Sample Submission
Owner: Supplier Timing: Before batch order placement Output: Physical sample submitted with production data. Sample is evaluated against the specification — not against general impression.
Step 4 — Physical Mock-Up
This is the step most frequently skipped on projects of all sizes, and the one that prevents the majority of acceptance disputes.
A compliant mock-up for a large facade project should include:
- Actual neon flex product (same model as proposed batch)
- Actual installation structure (channel, reveal depth, mounting method)
- Representative background surface (actual or matched material)
- Representative installation length — at minimum 3–5 meters of continuous run
- Representative curve radii and connection points
- Nighttime evaluation as the primary review condition
The mock-up is reviewed and approved by the client, designer, and main contractor together. This joint approval creates the single most useful document in any subsequent color dispute.
Step 5 — Multi-Condition Verification
Before final mock-up approval, review the installation under:
- Dusk (partial ambient light)
- Full darkness
- With adjacent architectural lighting active
- Front-on and oblique viewing angles
- Primary and secondary viewing distances
This step frequently surfaces issues that were invisible at the office sample review stage.
Step 6 — Specification Update
If the mock-up review reveals any gap between the design intent and the actual visual result, the specification is updated before batch production is approved. This is the cheapest possible point at which to make a correction.
Step 7 — Batch Production Control
Owner: Supplier + QA Timing: During production
Key controls:
- First-off batch confirmed against approved reference sample
- Batch records maintained and traceable
- Sample retention from each production batch
- Deviation from approved reference triggers hold — not direct shipment
Step 8 — Installation Sequence Management
Owner: Installing contractor Timing: During installation
Key controls:
- Do not mix batches across high-visibility or color-critical zones
- Validate first installed section before proceeding
- Flag any visible anomalies immediately — do not continue installing over a suspected problem
Step 9 — Final Acceptance
Owner: Client + designer + main contractor Timing: After installation is complete
The acceptance review is conducted against the pre-agreed standard: approved mock-up, defined observation conditions, and documented parameters. No party may unilaterally change the acceptance condition at this stage.
Step 10 — Responsibility Matrix
Before project execution begins, document who is responsible for each failure mode:
| Failure Mode | Responsible Party |
|---|---|
| Specification was ambiguous | Design team |
| Product does not match approved sample | Supplier |
| Procurement substituted unapproved product | Procurement |
| Batches were mixed in installation | Contractor |
| Acceptance condition was changed post-approval | Client or PM |
A pre-agreed responsibility matrix does not prevent problems. It prevents the most expensive kind of problem: the multi-party dispute where everyone is simultaneously correct and no one can be held accountable.
What Are the Most Common Color Specification Traps in Tender Documents?
Tender documents for LED neon flex projects repeat the same specification errors across markets and project types. Knowing these traps in advance is the fastest way to improve a specification before it creates a procurement problem.
The five most common neon sign color specification traps are: using only a color name without a reference sample, using a rendered image as the acceptance standard, approving a sample without documenting its engineering status, omitting observation conditions from the acceptance criteria, and validating color from a short sample rather than a representative mock-up.

Trap 1 — Color Name Without Reference Sample
A color name expresses intent. A reference sample anchors it. Without the sample, every supplier is guessing at what specific shade of "blue" or "warm white" the project requires — and guessing differently.
Fix: Require a physical reference sample as part of the tender response. Retain and number all approved samples.
Trap 2 — Render as Acceptance Standard
Render colors are produced by a display device operating in a color space that bears limited relationship to how LED light reads on a physical surface at night. Renders are design communication tools. They are not engineering acceptance documents.
Fix: State explicitly in the specification that rendered images are indicative of design intent only and do not constitute acceptance criteria.
Trap 3 — Sample Approved Without Defined Status
Many purchase orders carry a "Sample Approved" notation without specifying what was actually approved: the physical appearance, the light output color, the production batch standard, or all three.
Fix: When approving a sample, record its exact engineering status. Is this sample the color standard for the production batch? Under what conditions was it evaluated? Who approved it?
Trap 4 — No Observation Conditions Defined
Without defined observation conditions, a compliant product evaluated under the wrong conditions will fail, and a non-compliant product evaluated under favorable conditions will pass. Both outcomes undermine the specification.
Fix: Define primary observation conditions in the tender document. For neon sign and facade lighting projects, nighttime on-site evaluation against the representative background material is the minimum standard.
Trap 5 — Sample Approval Without Mock-Up
A single one-meter sample validates that a product produces a particular color. It does not validate how that color reads across a continuous 300-meter facade installation against real architectural surfaces